
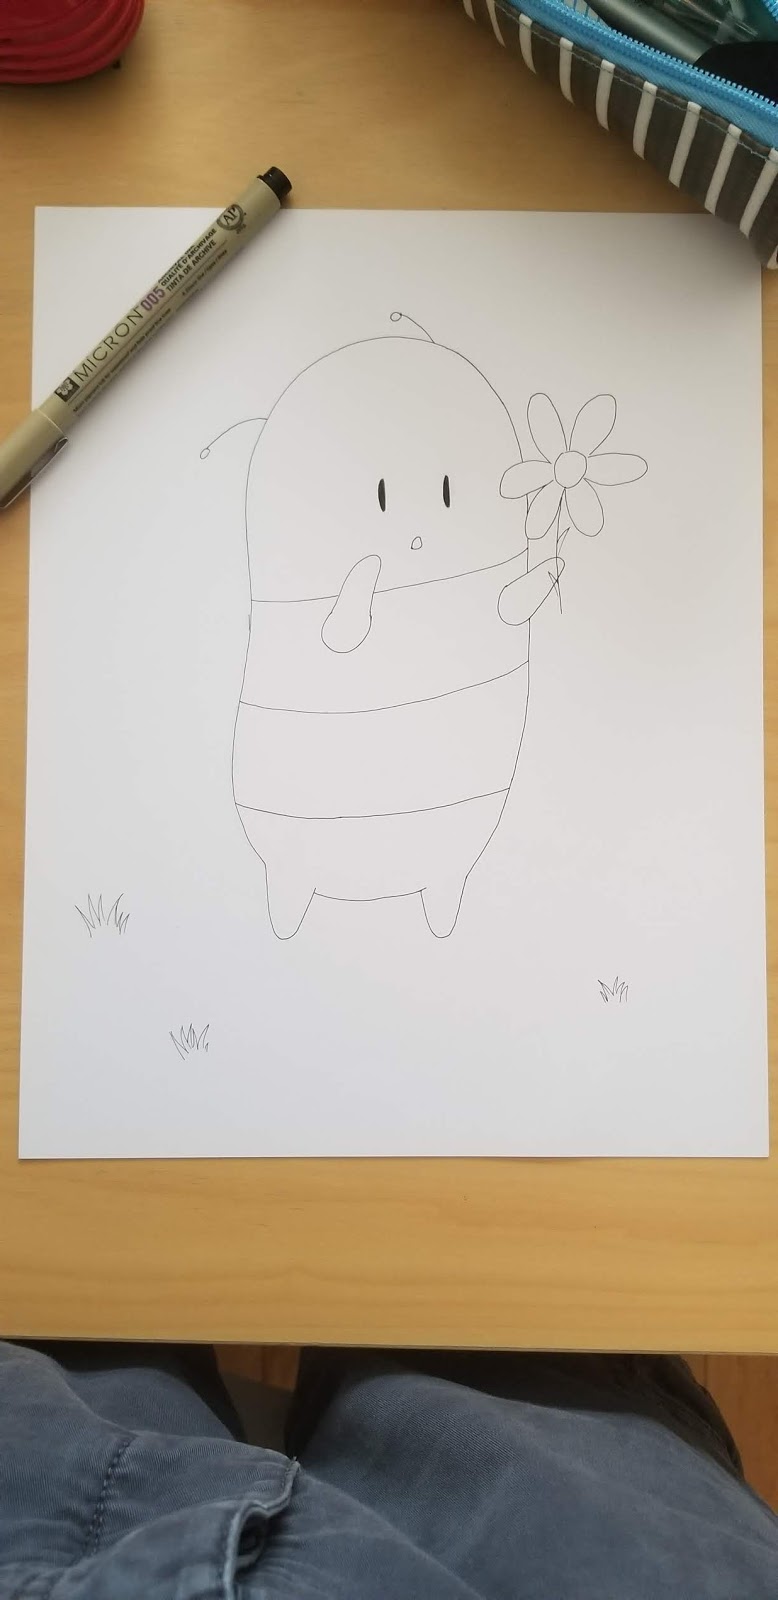
Monday, December 9, 2019
At long last, I have started my first comic!
Mystery Cats will hopefully be a series of web comics that I will try to release every few weeks, since coloring and drawing take so long for me :/. I hope you enjoy reading the first chapter, Exploration!~
P.s. Please bare with me as my drawings are not amazing and I am still learning how to structure everything. I never do backgrounds, or comics for that matter, so you can probably see how much it changes from the first page to the next.


Wednesday, October 30, 2019
I was trying to draw a tilted head view, but failed miserably. The arms are also messed up, along with the head size, shoe size, pants, and shoulders. The hair is just bare minimum okay since I spent exactly 2 seconds shading it. If I keep spotting out all the horrible mistakes this would turn into an essay.


It's... it's alright. I will try to make some shading and actual body shape in the final draft. (The upper body has some weird elongated shape to it and the right knee is not as voluminous as the left, even though the gravity would be pulling the fabric and making it bigger IRL).

Here I have the outline drawn in with a micro pen on some nice Xpress paper. It looks worse than the one above which is not a good sign.


Tuesday, October 1, 2019

Sunday, September 29, 2019


Cosplay #3
While I was waiting for my mom to show me how to make the vest, I decided to finish one of the elements of the cosplay that I knew I could tackle by myself. I managed to make four bags, that actually are very nice looking, in my opinion. The outside material is a softer cotton while the inside was meant to be for the vest, but ended up being too hard to work with, so we are substituting it with a cotton bed sheet (another post for that will come later).Here are some pictures of my progress!
 |
| Here are all the pieces that I used as a template for all four of the bags. |

 |
| First sewn bag, outside with decorations. |
 |
| First sewn bag, inside. |
 |
| All bags fully finished! |


I tried to make some cinnamon buns from a Binging with Babish episode : https://www.youtube.com/watch?v=jFYi2QRVFOc
I think I messed them up, but they were very soft and delicious! The only difference between mine and his are that I used cake flour on accident, so the dough was extremely soft and sticky, which just resulted in the most pillowly and fluffy rolls I have ever eaten.


Saturday, September 21, 2019
Cosplay Post #2
Here is the link to the video I used for the mask sewing pattern: Link
This is the link to the machine we bought: Link

Here is the shirt fully cut out, with the individual components ready for sewing.
 |
| Here is the finished/sewn shirt. |
 |
| Thank you mom for buying a specialized machine for the ends! |

I forgot to take pictures of the mask in-the-making, but the finished product should suffice.
Here are some pictures of how it looks on a person.
I love editing.


Monday, September 16, 2019


Saturday, August 31, 2019
Peach Cookies

Original Recipe : https://www.youtube.com/watch?v=lQmLrxNH6jU&t=1s
(Btw, I love this channel and highly recommend the recipes to people who love cute and pretty desserts.)
These wondrous cookies are sold all over Bulgaria in little bakeries or convenience stores. The recipe I found is originally Italian and thus is a bit different. Peach Cookies are called "Praskovki", meaning "cute peach", but instead of being sort of dry, like the original recipe, they are instead soaked in a sugar syrup for a few minutes and they are made with baking powder to get a more cake like texture. The Italian version is a bit drier, but also a lot less sweet and instead tastes more like it was actually made of peaches. I hope you make this recipe and enjoy eating (or decorating, in my case) them!
(I doubled this recipe to make more cookies since I was distributing them to my starved friends.)
Ingredients (For one batch of eight cookies.)
1 peach
30 g sugar
200 g water
10 g honey
10 g honey
40 g room temperature butter (Unsalted)
70 g powdered sugar
1 egg
1 tsp or to taste Vanilla extract
5 g lemon juice (I used half a Costco lime)
185 g flour
Red food coloring
Granulated sugar
Directions
Place water, sugar and sliced peach in a pot of your choice, bringing it to a small boil then letting it simmer until the peach is very soft and the liquid is a nice pink color. Then carefully pour the liquid into a separate bowl and set aside.

With a hand blender, mash the peaches into a puree and put back on the flame. Cook it, stirring consistently until it forms a thick paste that holds it's shape and is not watery.
For the cookie, take your butter and mix with the sugar until fully combined. Add in your egg, vanilla, and lemon juice. Mix. Lastly, sift in your flour and fold together with a spatula. Preheat your oven to 340 F (170 C). Divide your dough into 20 g balls and bake for 20-30 minutes or until baked thoroughly. Place all cookies on a cooling rack once done, and start carving a little hole in the bottom of the cookie with the edge of a knife. Be gentle and careful as you carve because the cookies are very breakable.

 Next, take your cookie crumbs and mix it into the peach puree along with the 10 g of honey. Take your peach syrup next and add in some red food coloring and mix. To assemble the cookie: Take a cookie and fill with the puree, making sure there is a little bit extra on it. Place another cookie on it, stick them together, and twist a bit. Now run your finger around where the cookies are stuck together to remove any extra puree. Dip each side of the cookie in the syrup, let it sit for about 1 minute, and roll around in your granulated sugar. Repeat these steps for the other cookies. Enjoy!
 Tip: If you want cookies that are a bit more moist, dip a second time in the syrup for about 1 extra minute on each side or until you get the desired wetness.
Syrup on the left, cookies on the right.


The filling may not look great, but it sure did disappear fast from our kitchen!


Assemble Cookies, ready for dipping and coating.

The filling may not look great, but it sure did disappear fast from our kitchen!


Sunday, August 18, 2019
Cosplay Post #1
After attending Anime Expos, watching cosplayers cosplay, and experiencing the wondrous world of sewing, I thought it was about high-time I got down to work. Making my own cosplay for Anime Expo 2020. I knew this would most likely take me about a year to complete, but I was and am ready for the challenge. I started out by picking a character I would like to replicate. After many weeks of searching, one of the skins from Akali (League of Legends) popped out to me. It was the Silverfang Akali.
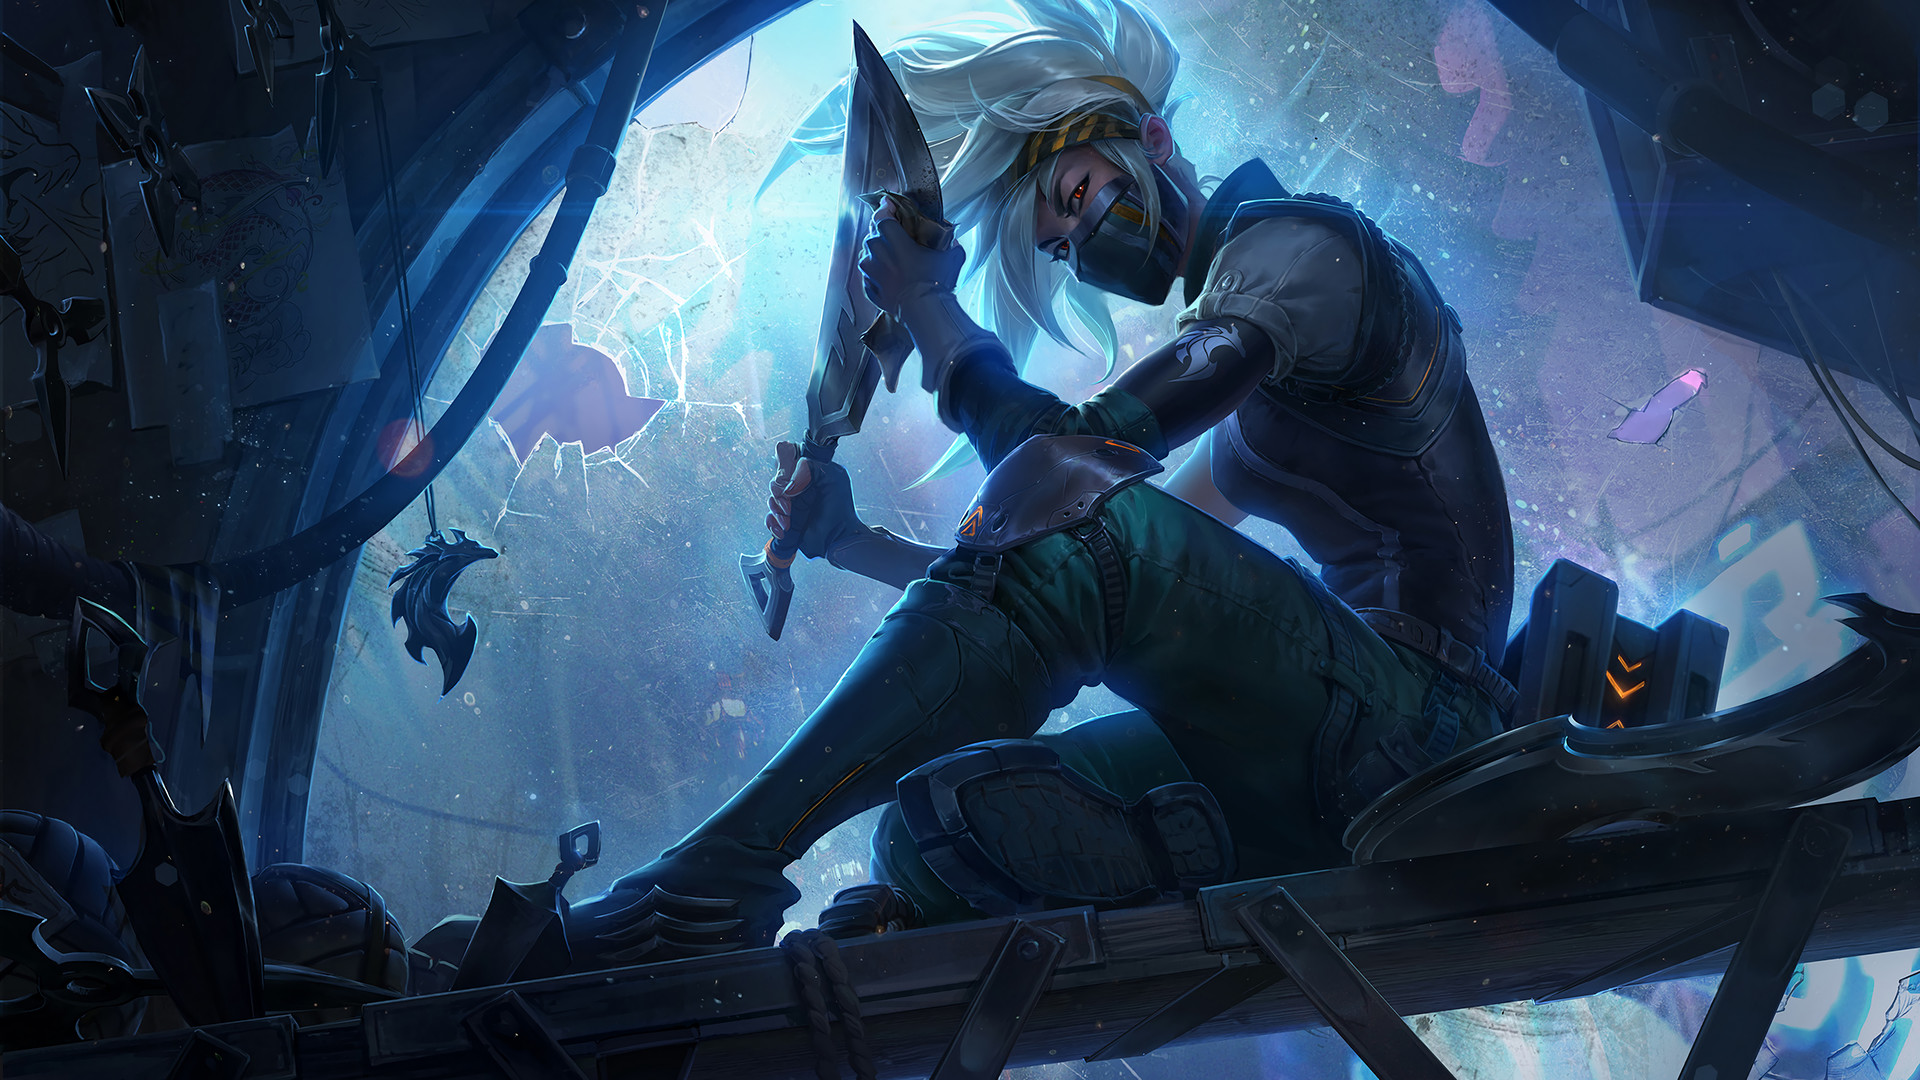
I think she looks really cool, and the fact that I have a 3D model at my disposal thanks to Riot, makes my research a lot easier.
I started out by mapping out all the items and components that I would need to make in order to make the costume. I also used a lot of tutorials from Kamui Cosplay and Cosplay Shop.

Next up was to go and buy the fabrics. My mom helped a lot with the picking of the fabrics because she went to a sewing specialized high school and knew her way around clothes. We ended up buying 4 fabrics.
From the left- A soft T-shirt material for the undershirt. A hard material for the vest. A semi hard material for the pants. And A softer material for the gloves, fake sleeves, and any other extra things.

Then I used a tight shirt I had to make the template for the sewing pattern.


 |
| The template. My mom said that the far left one was not good so I only used the other two. |
 |
| The shirt will have a high neck, so I didn't bother cutting out the neck hole. |
Subscribe to:
Posts (Atom)